
T TRIPOAI

Use tripo segmentation to work with separate 3D parts

Tripo segmentation is useful when a generated object needs distinct pieces for posing, material changes, or further editing. Start with a clear model, then inspect every proposed boundary before using the parts.

Inspect part boundaries before editing
Tripoai landing-page illustration of 3D model creation

Prerequisites

Before separating parts, make the object and the intended boundaries easy to identify.

Tripoai feature illustration showing a 3D creation workflow
01

Start with a readable shape

Choose a model whose major components are visible from more than one angle. A sword crossing a torso or a handle buried in a hand can make the intended cut ambiguous. Rotate the Tripo model and decide which objects must move independently; visible color changes alone do not prove that the geometry is separate.

  • Identify each part you actually need to edit.
  • Check hidden and overlapping surfaces.
Tripoai feature illustration of a 3D object
02

Decide how the pieces will be used

A game prop may need a movable lid, while a printable miniature may need a removable base. Write down the intended parts before attempting segmentation, and keep an untouched version of the Tripo model for comparison. If the source is an image, favor a view with a clean silhouette and visible space around accessories.

  • Name the pieces by function, not just appearance.
  • Preserve the original model before editing.

One full run-through

Use a sword-and-shield character as a concrete test: the goal is to handle both accessories without altering the body.

  1. 1

    Generate and inspect

    Create the character with clear space between the shield, sword, and torso. Turn the Tripo result around to check whether either accessory merges into a hand or disappears behind the body.

  2. 2

    Identify intended boundaries

    In a workspace that offers part selection or separation, select the sword first and inspect the highlighted region from several angles. Repeat for the shield; do not assume a visually distinct texture means the mesh can be moved on its own.

  3. 3

    Test each separated piece

    Move or hide each resulting part in a copy of the model. Look for holes, stray faces, and chunks of the torso that followed an accessory. Undo an incorrect boundary and refine the source or selection before continuing.

  4. 4

    Check the intended destination

    Inspect the Tripo result in the editor or viewer where you plan to use it. Confirm part names, orientation, and whether the separated surfaces need cleanup; a clean preview alone does not establish that a model is ready for animation or printing.

Options table

These are workflow choices, not promises that every Tripo workspace exposes the same controls.

Keep one combined model
Work with separate parts

Best for

Keep one combined model

A static preview or single-piece concept.

Work with separate parts

Accessories, material zones, or pieces that must move independently.

Initial inspection

Keep one combined model

Check the overall silhouette.

Work with separate parts

Check the silhouette and every proposed boundary.

Sword-and-shield example

Keep one combined model

Character and accessories remain one object.

Work with separate parts

Test whether sword and shield can be selected without body geometry.

Editing effort

Keep one combined model

Fewer pieces to organize.

Work with separate parts

Each piece needs a name, position check, and surface inspection.

Common risk

Keep one combined model

An accessory cannot be repositioned on its own.

Work with separate parts

A cut may leave holes or carry unwanted faces into another piece.

Before final use

Keep one combined model

Verify shape and orientation.

Work with separate parts

Verify shape, orientation, fit, and the boundaries of every part.

What fails

The difficult cases are usually intersections: straps crossing a body, fingers wrapped around a handle, or surfaces hidden in the source view.

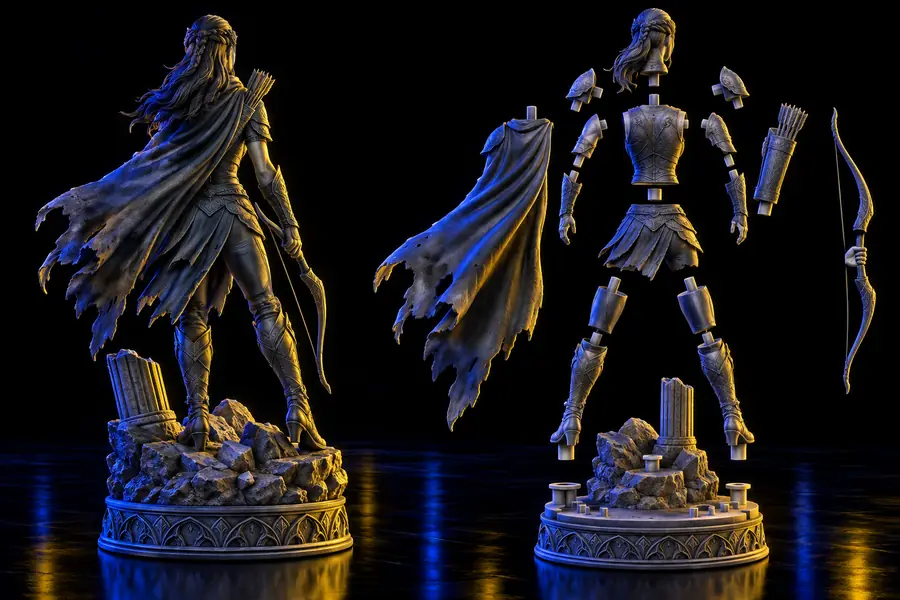
Fantasy miniature shown as an assembled character Assembled form
Fantasy miniature illustrated as separate pieces Separate-parts example
These illustrations show the distinction between an assembled form and separate pieces; they do not verify a specific cut on your model. If Tripo selection includes stray geometry, return to the original, inspect the intersection from another angle, and revise the boundary.

Continue with a test model

Make the boundaries easy to judge

Try an object with a clearly detached accessory, inspect its Tripo geometry, and keep the original intact while testing separate parts. For a source-photo workflow, tripo image to 3d covers how the starting view affects the result. If the final asset needs simpler geometry, low poly 3d model generator explores that separate goal.

Create a 3D model
  • Check the model from multiple angles
  • Test each part before using it elsewhere

Tripo segmentation FAQ

Segmentation means identifying distinct regions or parts of a model so they can be handled separately. A color difference is not enough by itself: inspect the geometry to see whether a proposed part contains only the surfaces you intended.

It depends on the model and the separation controls available in your workspace. A clearly visible accessory with limited overlap is easier to isolate than one fused into a hand or body. Test the selection from several angles before relying on it.

Intersecting or hidden surfaces can make a boundary difficult to define. Keep the original model, review the problem area from another angle, and adjust the selection or source rather than treating the first cut as final.

Not automatically. Animation may require a suitable rig and correctly placed pivots; printing requires checks for fit and usable geometry. Inspect the resulting pieces in the tool you will use for the final task.

Start creating
Start creating